Getting started
This is the single path from a fresh install to a working chat. Brisal doesn’t seed anything for you — no default workspace, no ready-to-run assistant — so the first run is a short setup you do once, then reuse forever. Follow it in order; each step links to the concept behind it if you want the full story.
The whole path is:
launch → create a workspace → connect a provider → add a model → clone an agent → create a project → start a session.
1. Create a workspace
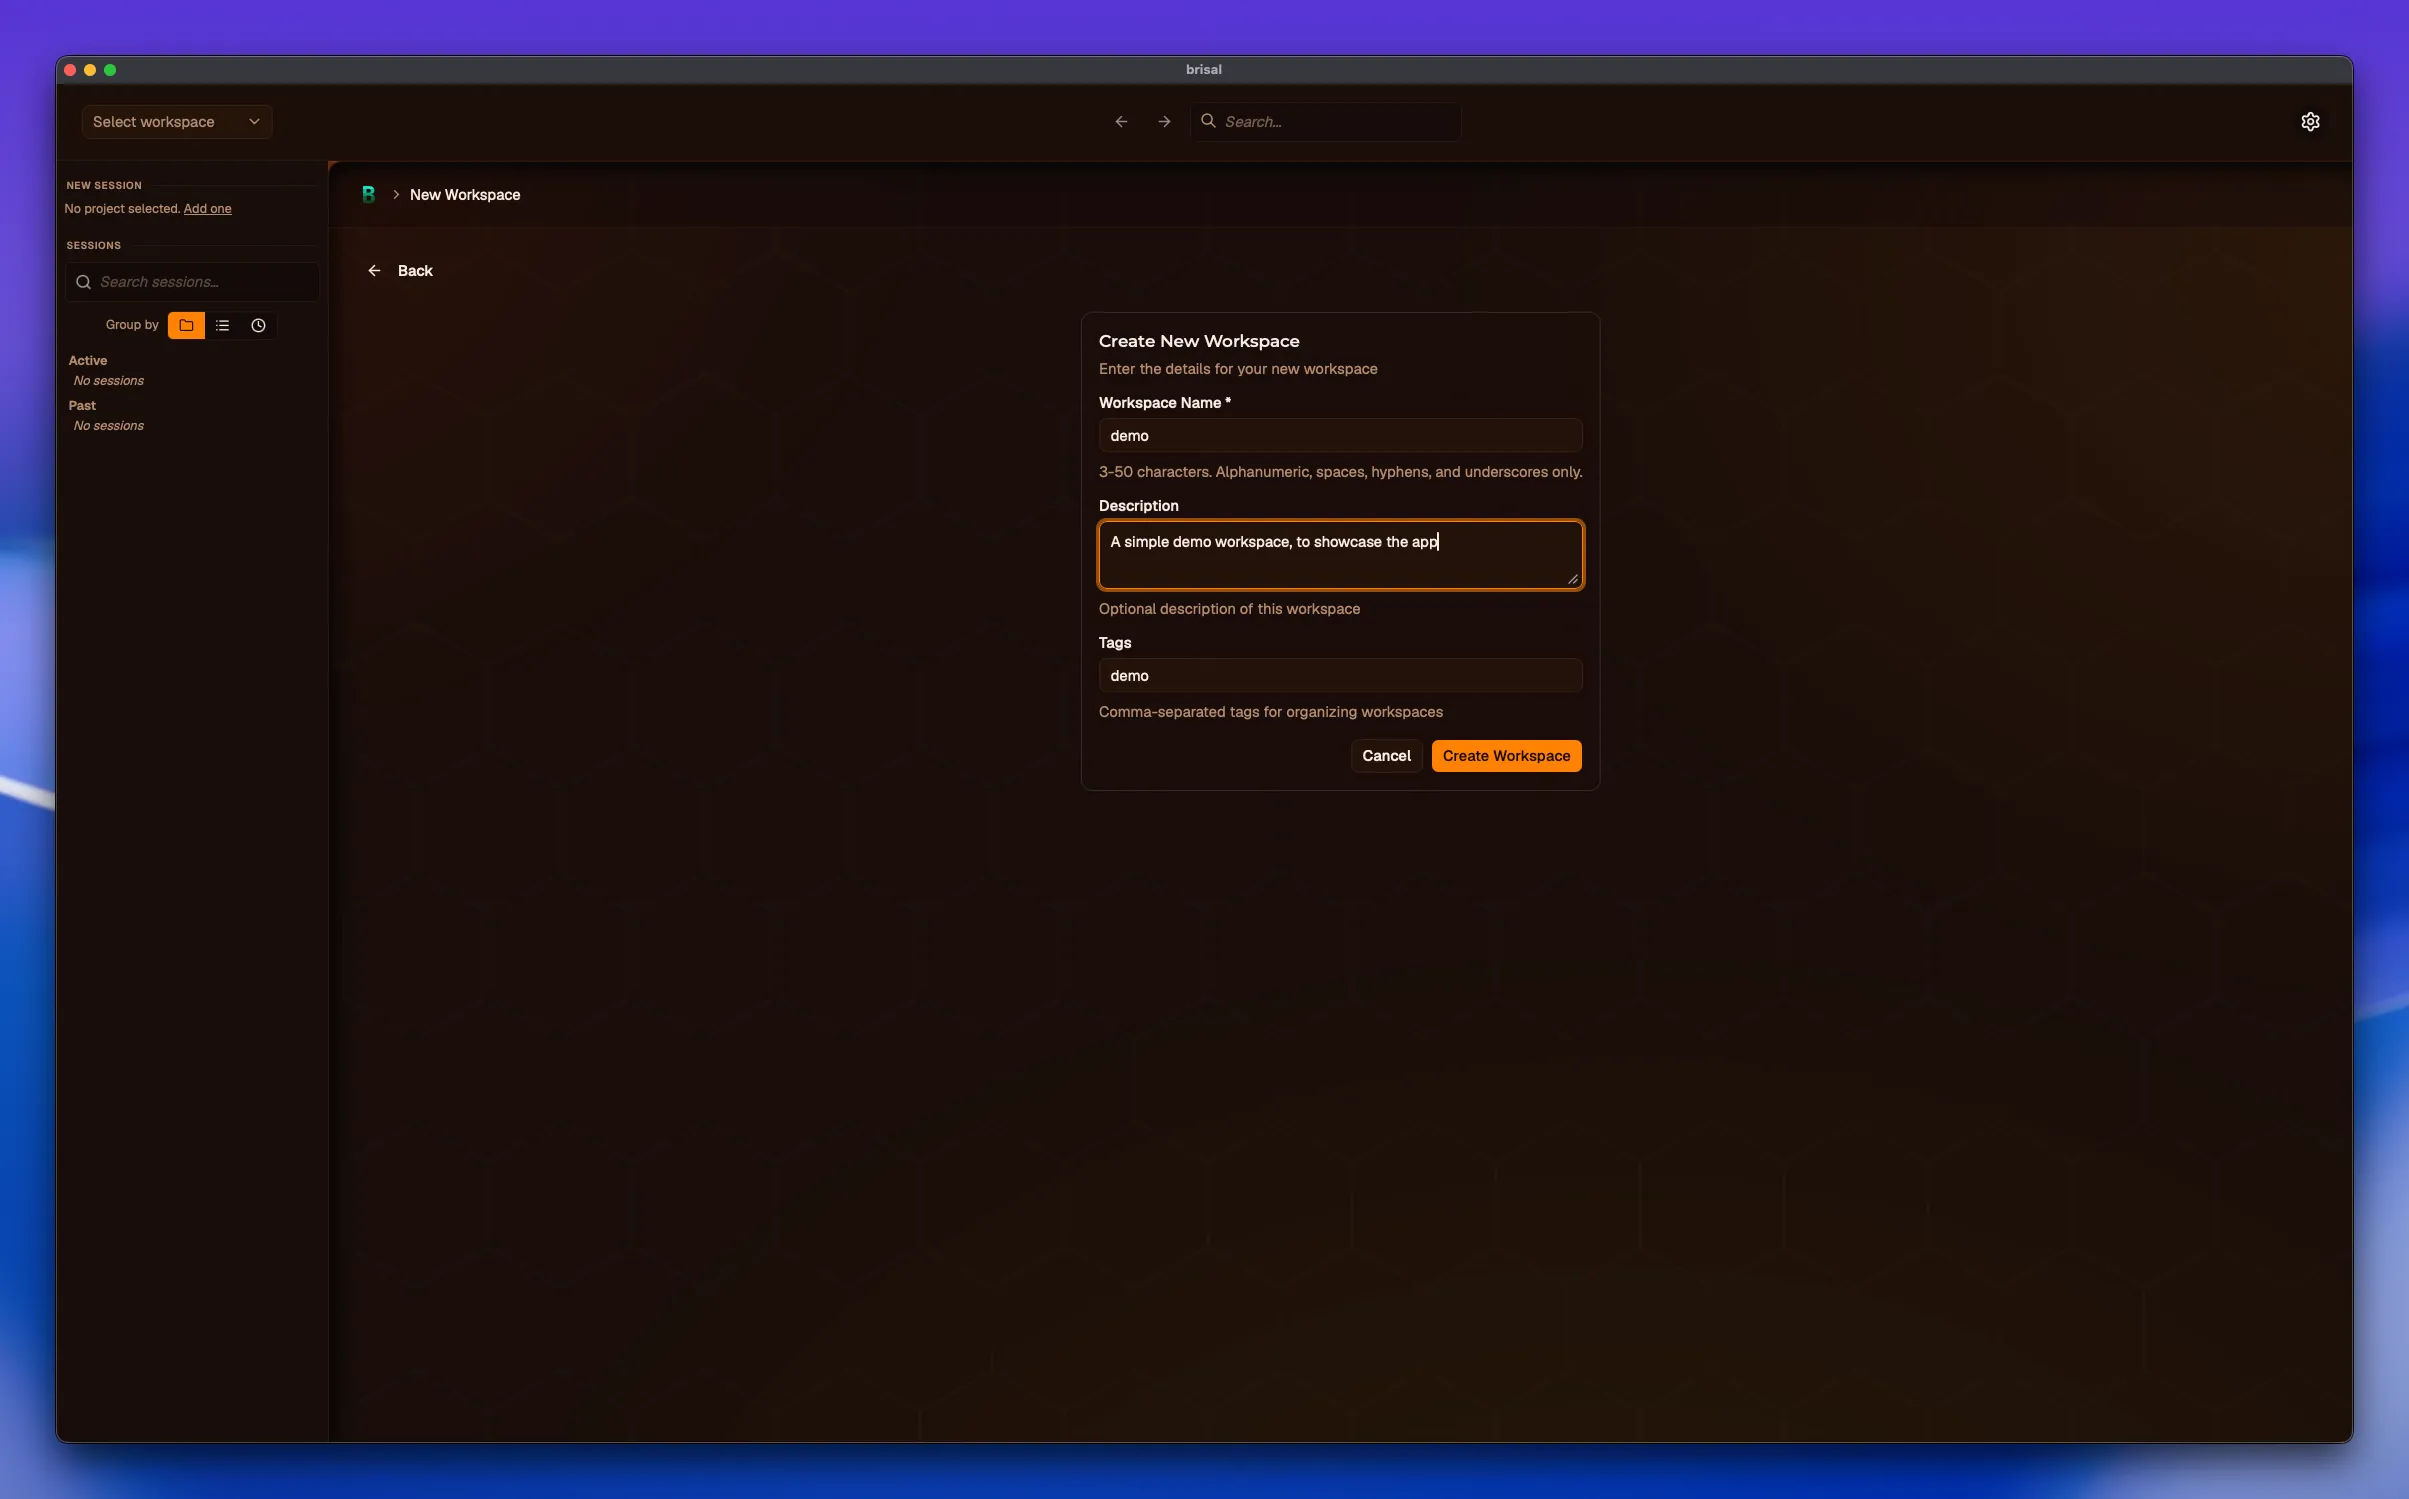
A workspace is the container everything else lives in. On first launch the pane shows a No Workspaces card — press Create Your First Workspace.
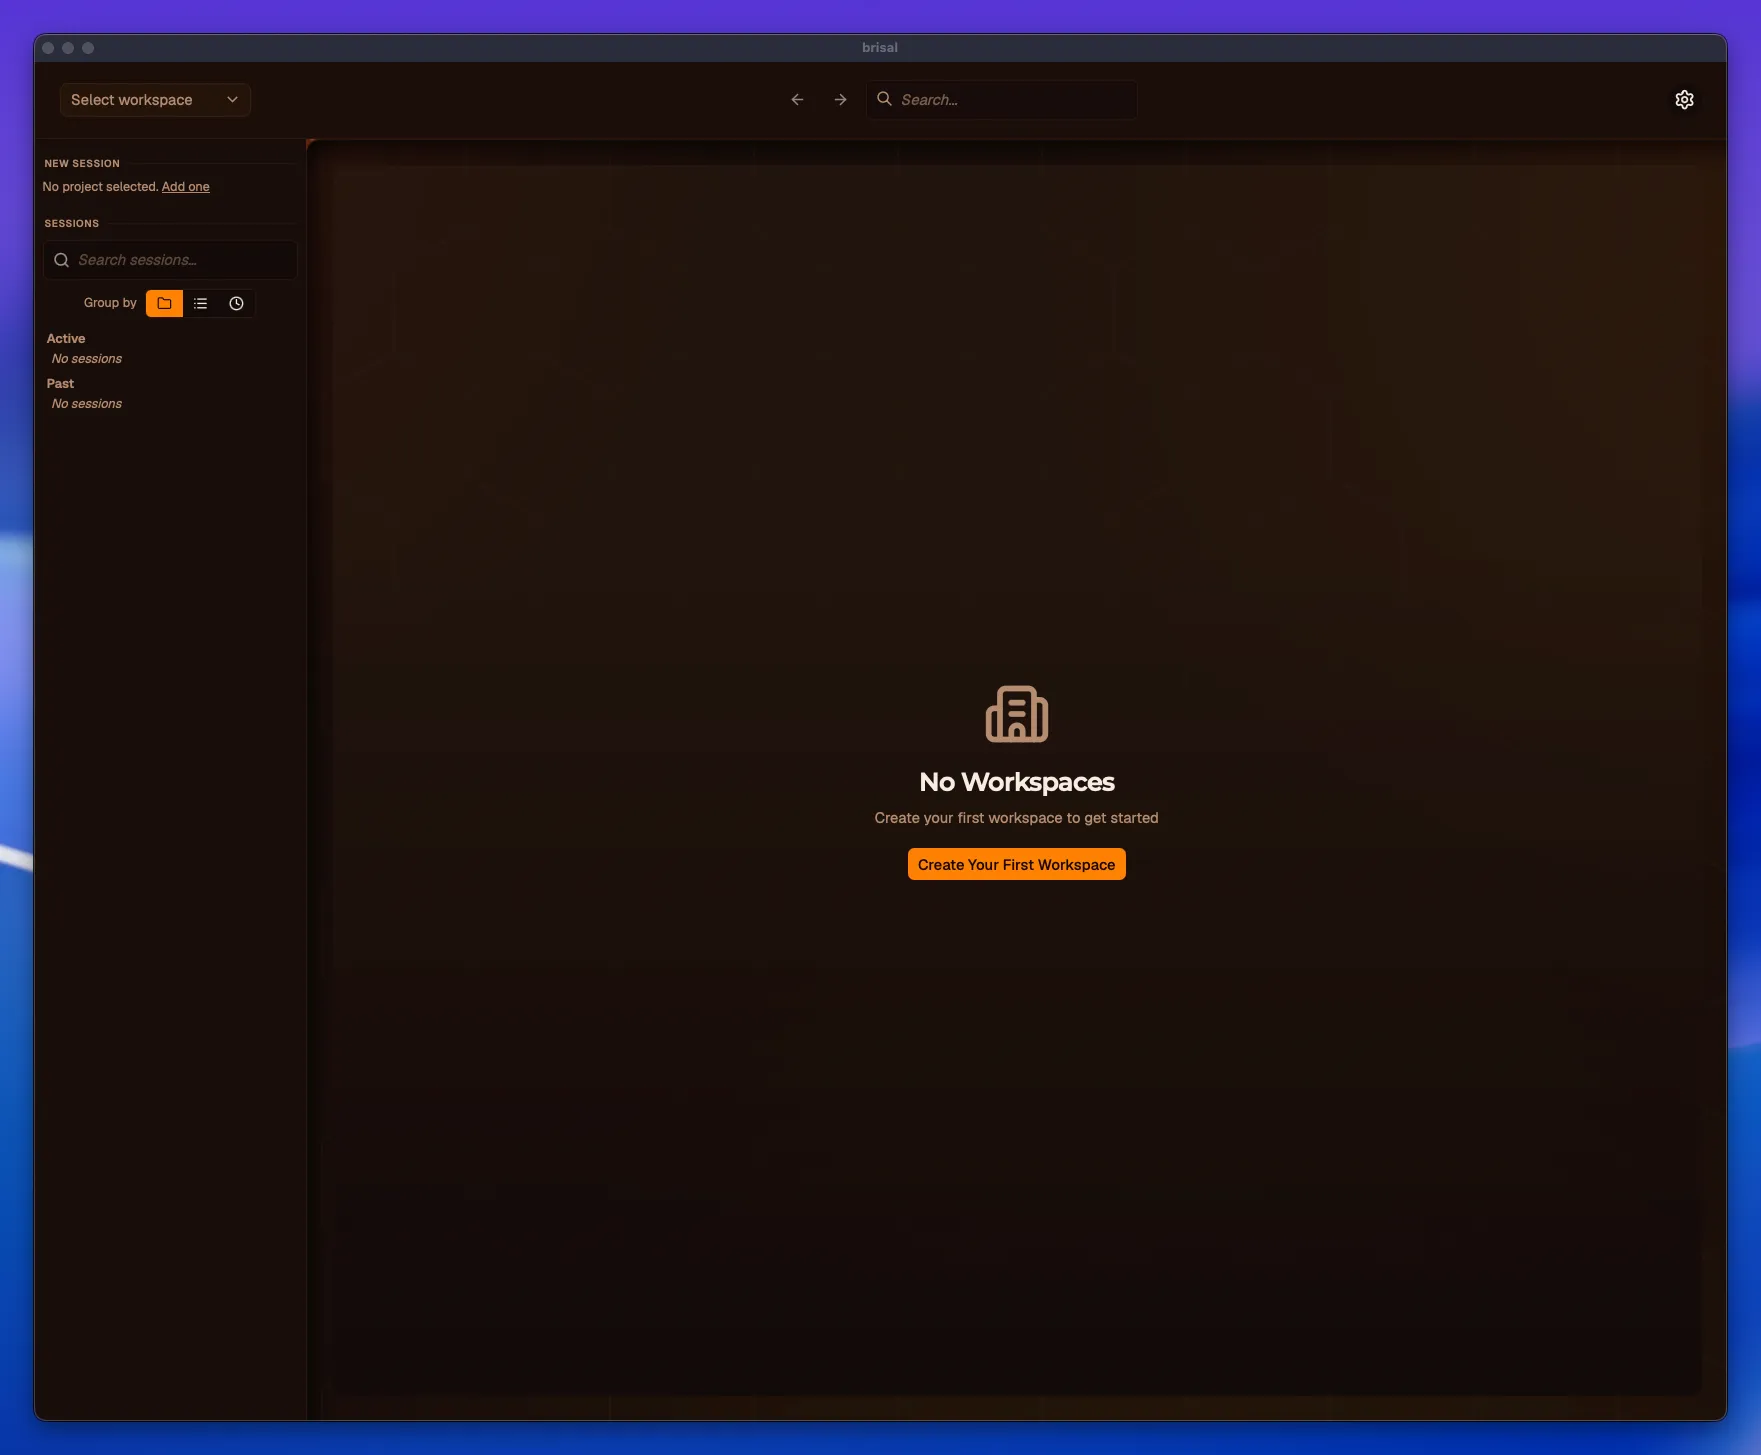
Give it a Name (3–50 characters; description and tags are optional) and create it. Brisal selects the new workspace automatically, so you land inside it, ready for the next step.
Everything from here on happens inside this workspace. If you ever need a second, walled-off context, you’ll make another — but most people never do. See Workspaces.
2. Connect a provider
A provider is the LLM service Brisal talks to. Open the workspace’s Providers tab. Brisal ships Mistral as a read-only built-in; you don’t edit it, you connect it to get your own editable copy.
Press Connect on the Mistral card. In the Login to Mistral dialog, give
the copy a Provider ID (any short name, e.g. mistral-workspace) and paste
your Mistral API key. The key is optional at this step, but set it now so the
chat at the end actually runs — Brisal hands it to your OS’s secure credential
store, never to a plain-text file. Press Login.
You now own a fully editable provider. Details, custom providers, and where the key lives: Providers.
3. Add a model
A model is the specific LLM a request runs — Mistral Medium 3.5, say. A freshly connected provider has zero models — this is the step most people miss.
From your provider’s card, press Models, then Add on the Mistral Medium 3.5 system model. Pick a Model ID and Display name (both default sensibly) and confirm. The model lands in the provider’s Available models list, bound to that provider. More: Models.
4. Clone an agent
An agent is the assistant you chat with — a model wrapped in a system prompt and behavior settings. Open the workspace’s Agents tab and press Clone on Le Chaton Fat, the shipped starter agent.
Give the clone an id and confirm. You now own an editable agent; it’s the one new sessions reach for by default. Tune its prompt and settings later — Agents.
5. Create a project
A project is the unit of work a session lives inside; you can’t start a session without one. Open the Projects tab, press + New Project, choose From Scratch, give it a Name, and create it.
A from-scratch project is empty — no code attached — which is all you need for a first chat, and it ships no project-local skills or hooks, so there’s no trust gate to clear. Creating it also selects it, so you land ready to chat. More: Projects.
6. Start your first session
A session is one conversation with your agent. From the project’s Sessions tab, press Start Session. You land on a draft screen — “not saved until you send the first message.” The agent and worktree both default sensibly (your default agent, the project’s current worktree), so you can just type a message and send.
That first send creates the session and streams back a reply. That’s it —
you’re running. The agent thinks, may call tools, and answers, all live in the
transcript. From here you can keep chatting, run a shell command with !, or
switch agents mid-conversation — see Sessions.
What was one-time, and what repeats
Almost everything above you did once. Your workspace, provider, model, agent, and project all persist and are reused across every session:
| One-time setup | Every session |
|---|---|
| Workspace, provider, model, agent | Pick an agent and worktree (both default) |
| Project (reuse it, or add more) | Type your first message |
Starting your next session is just Start Session → type → send. The setup path you just walked is the price of the first chat, not every chat.
What to read next
- Layout & navigation — the four regions of the window, now that you’ve seen them in action.
- Sessions — the chat loop in depth: turns, shell commands, annotations, forking, and switching models.
- Providers → Models → Agents — the building blocks, in full.
- Reference — config-file field tables and keyboard shortcuts for hand-tuning.